The goal of this tutorial is to demonstrate how to install a Drupal 10 site on DreamHost using composer and Drush.
Create a new Domain/Subdomain
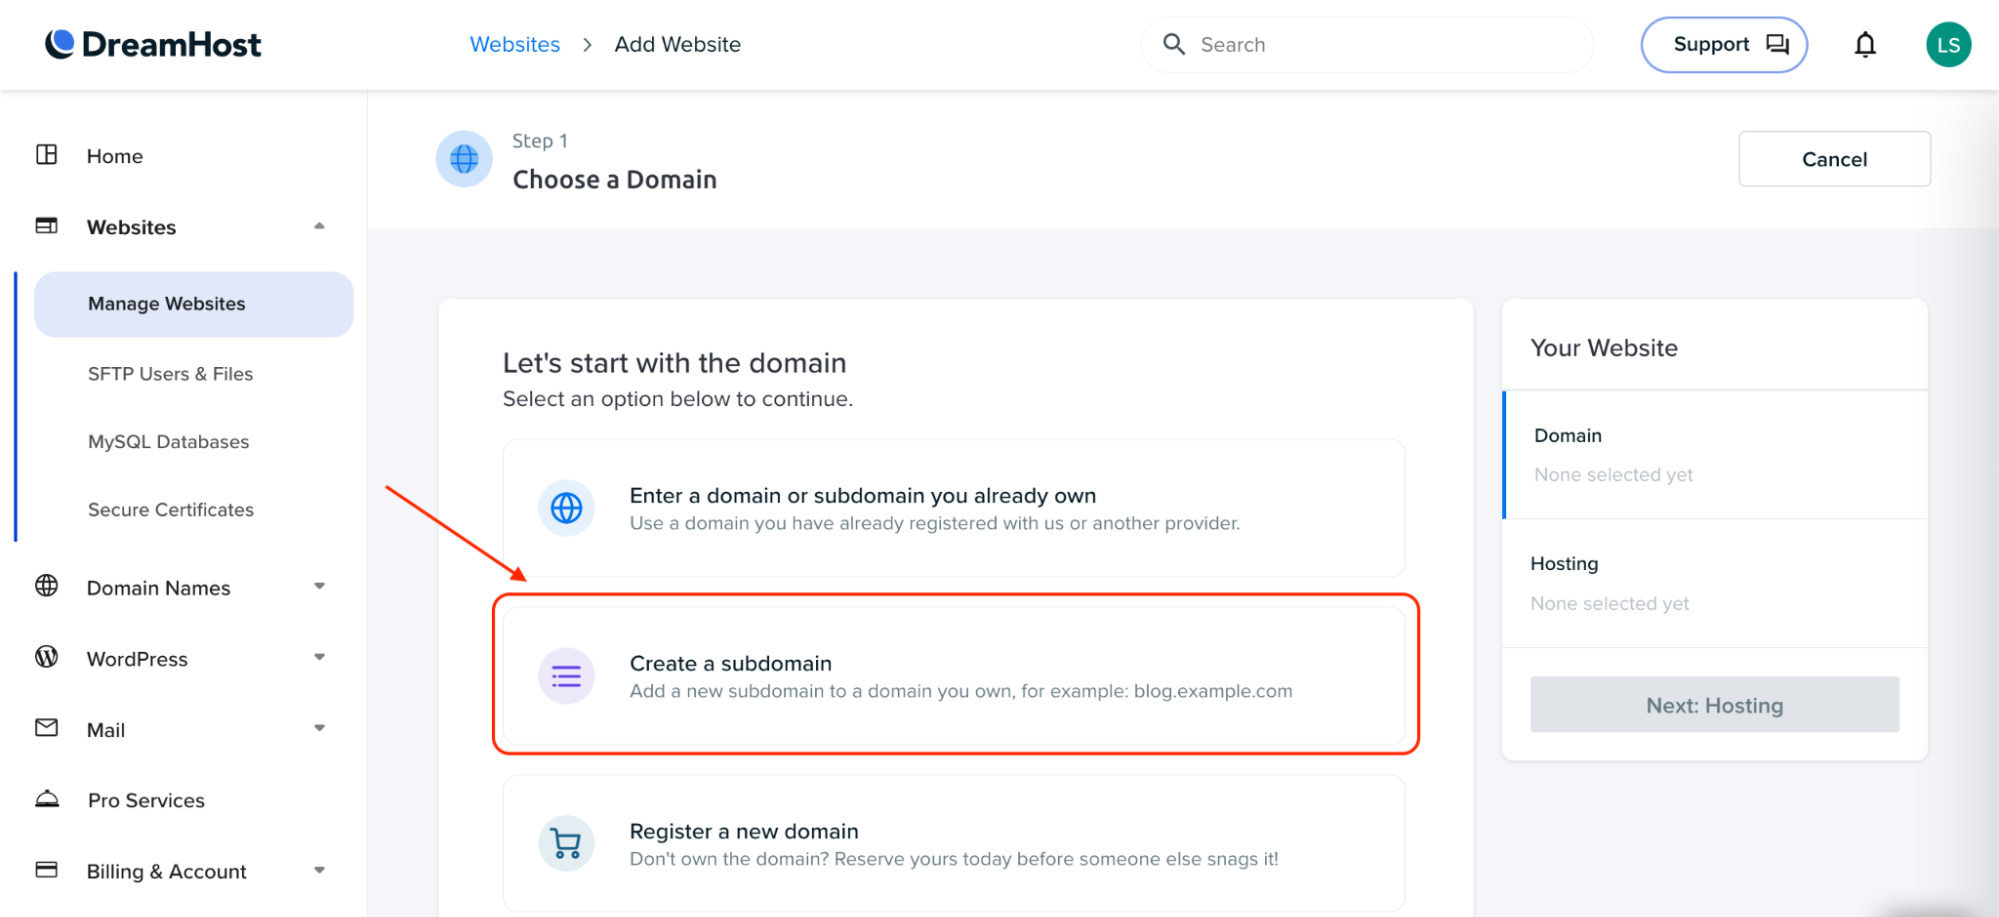
Login to your DreamHost account and navigate to “Websites” -> “Manage Websites” and click the “+ Add Website” button:

Choose a Domain for your new Drupal site. You have the following options to assign a Domain to your new Drupal site:
- Enter a domain or subdomain you already own
- Create a subdomain
- Register a new domain
For this tutorial, I will create a new subdomain for my Drupal site:
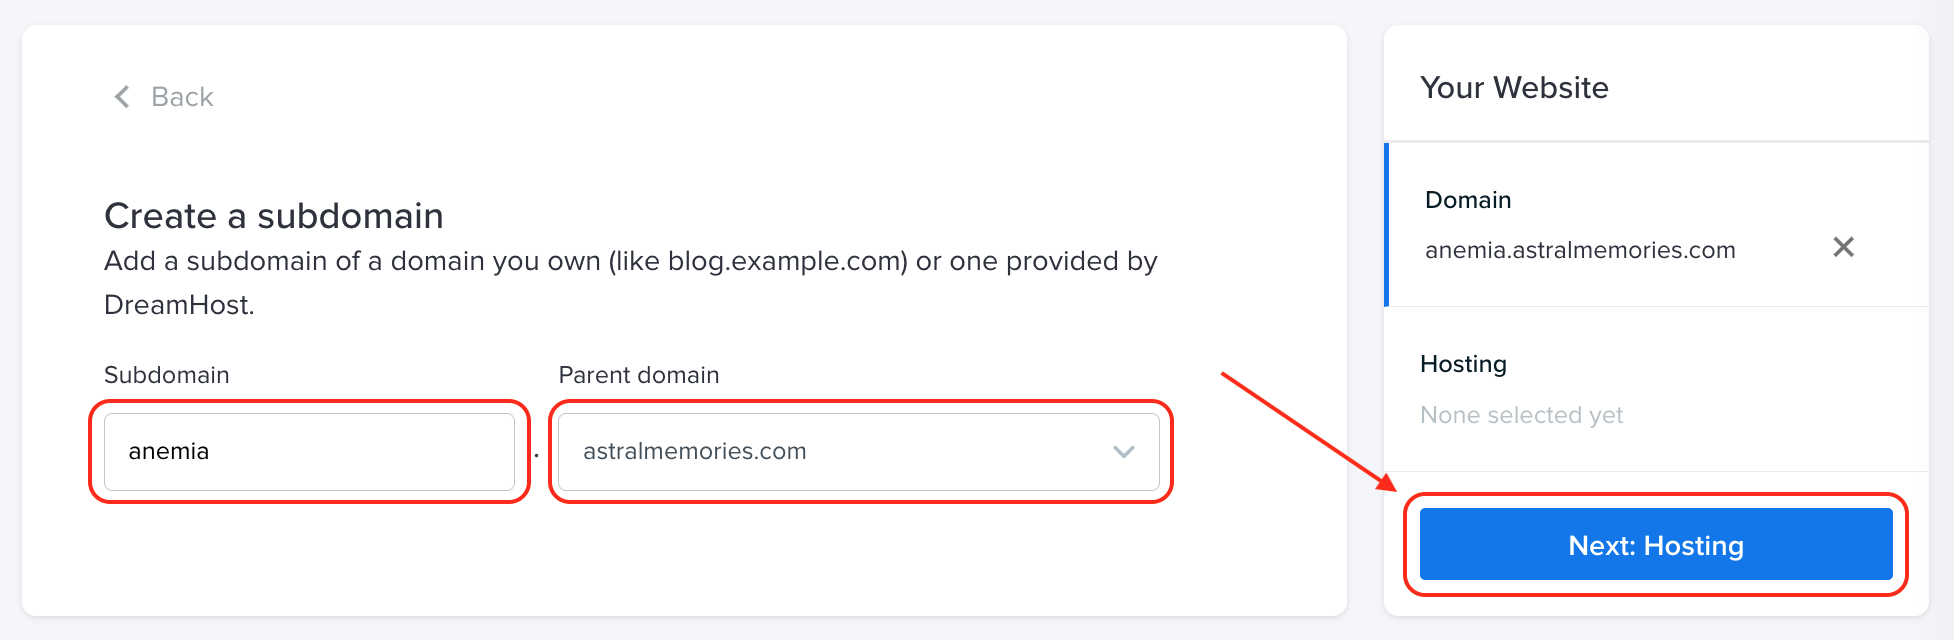
On the “Create a subdomain” page, assign a name for the subdomain and select the parent domain. Click the “Next: Hosting” button to continue:
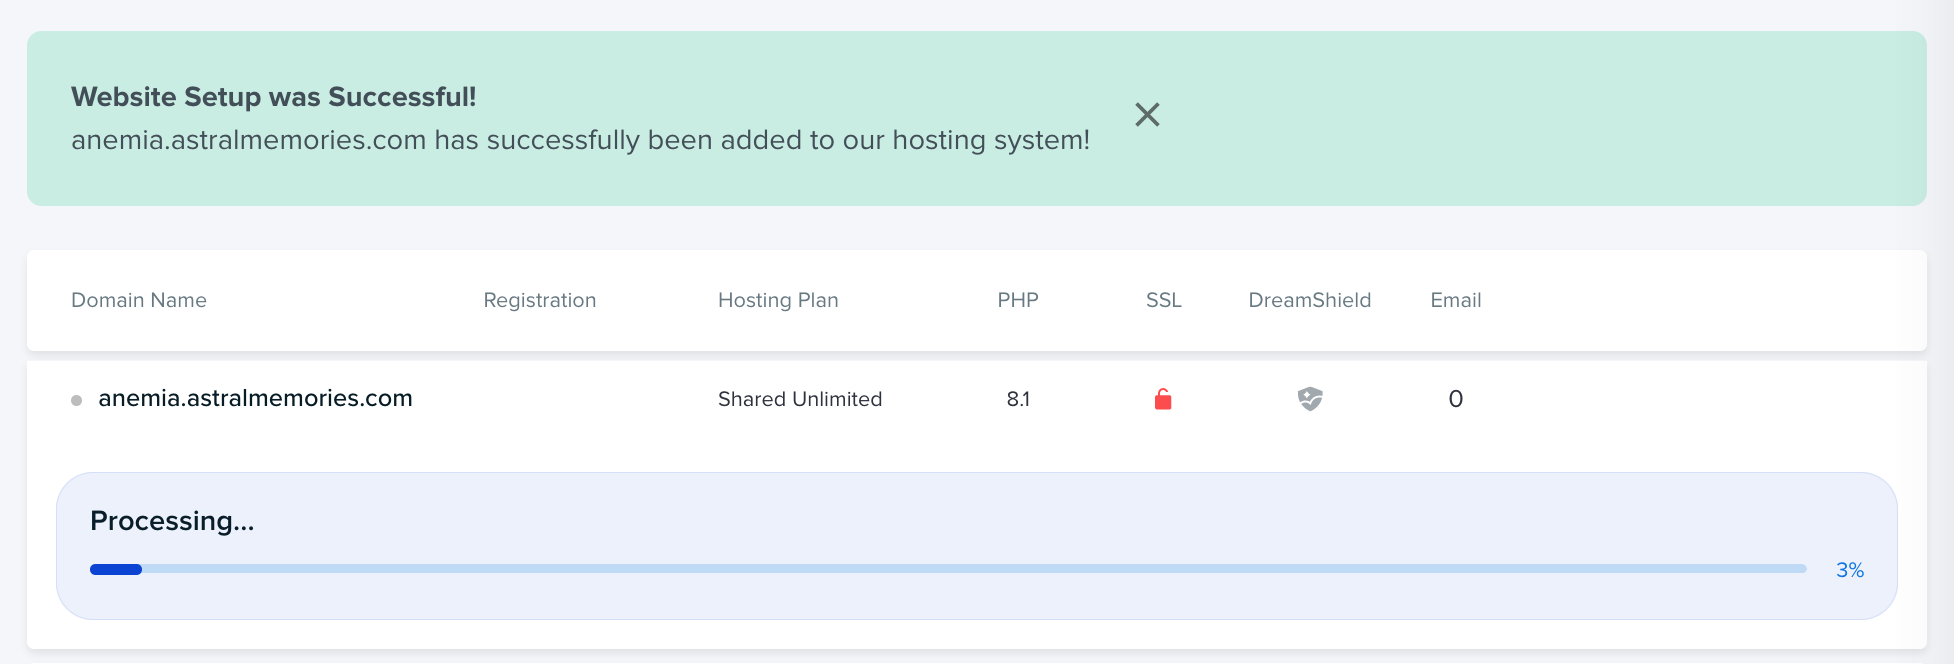
On the “Connect this domain to a hosting plan” page, I selected the “Shared Unlimited” option and then I clicked the “Set Up Website” button. I have the “Shared Unlimited” hosting plan with offers unlimited websites and free SSL certificates.

Wait until the process is complete:
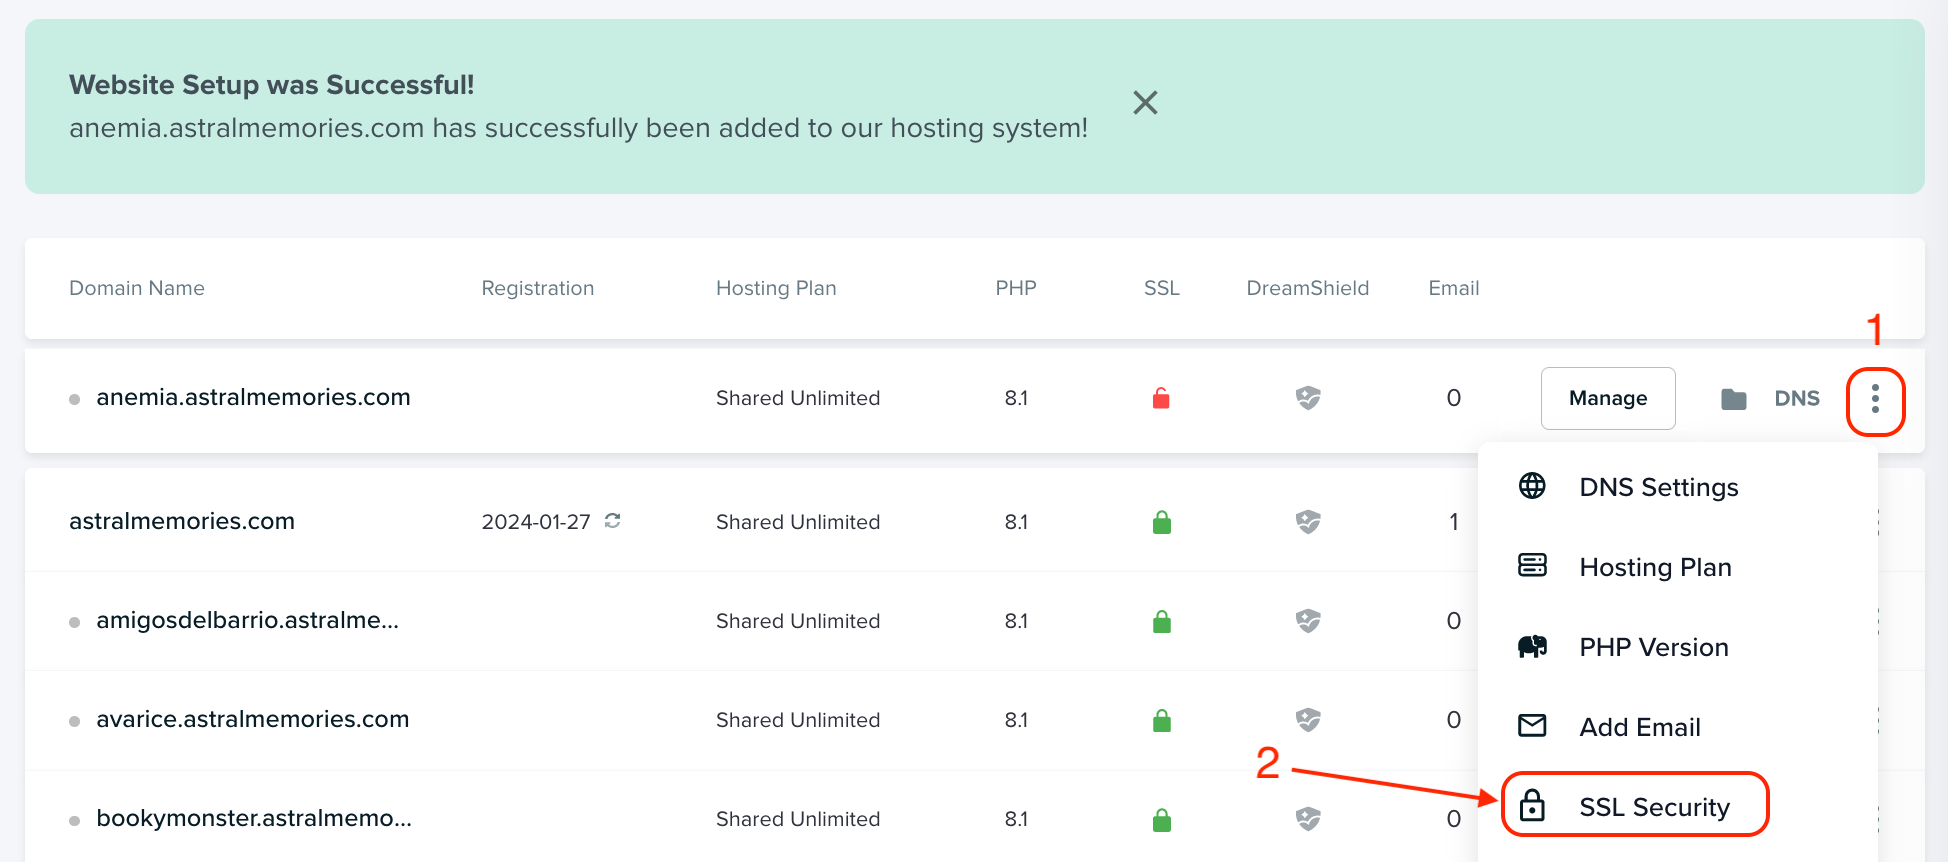
Add an SSL Certificate to your Domain/Subdomain
Once the website setup is completed, click the “•••” button next to your new subdomain/domain to show more options and then click the “SSL Security” link:
On the next page, under the Free Let’s Encrypt SSL Certificate option, click the “Select this Certificate” button:

Wait until the new certificate for your new subdomain/domain is complete. With this SSL Certificate, the traffic to your site will automatically get redirected to your site over a secure HTTPS connection. You should see this reflected on your website within 15 minutes.
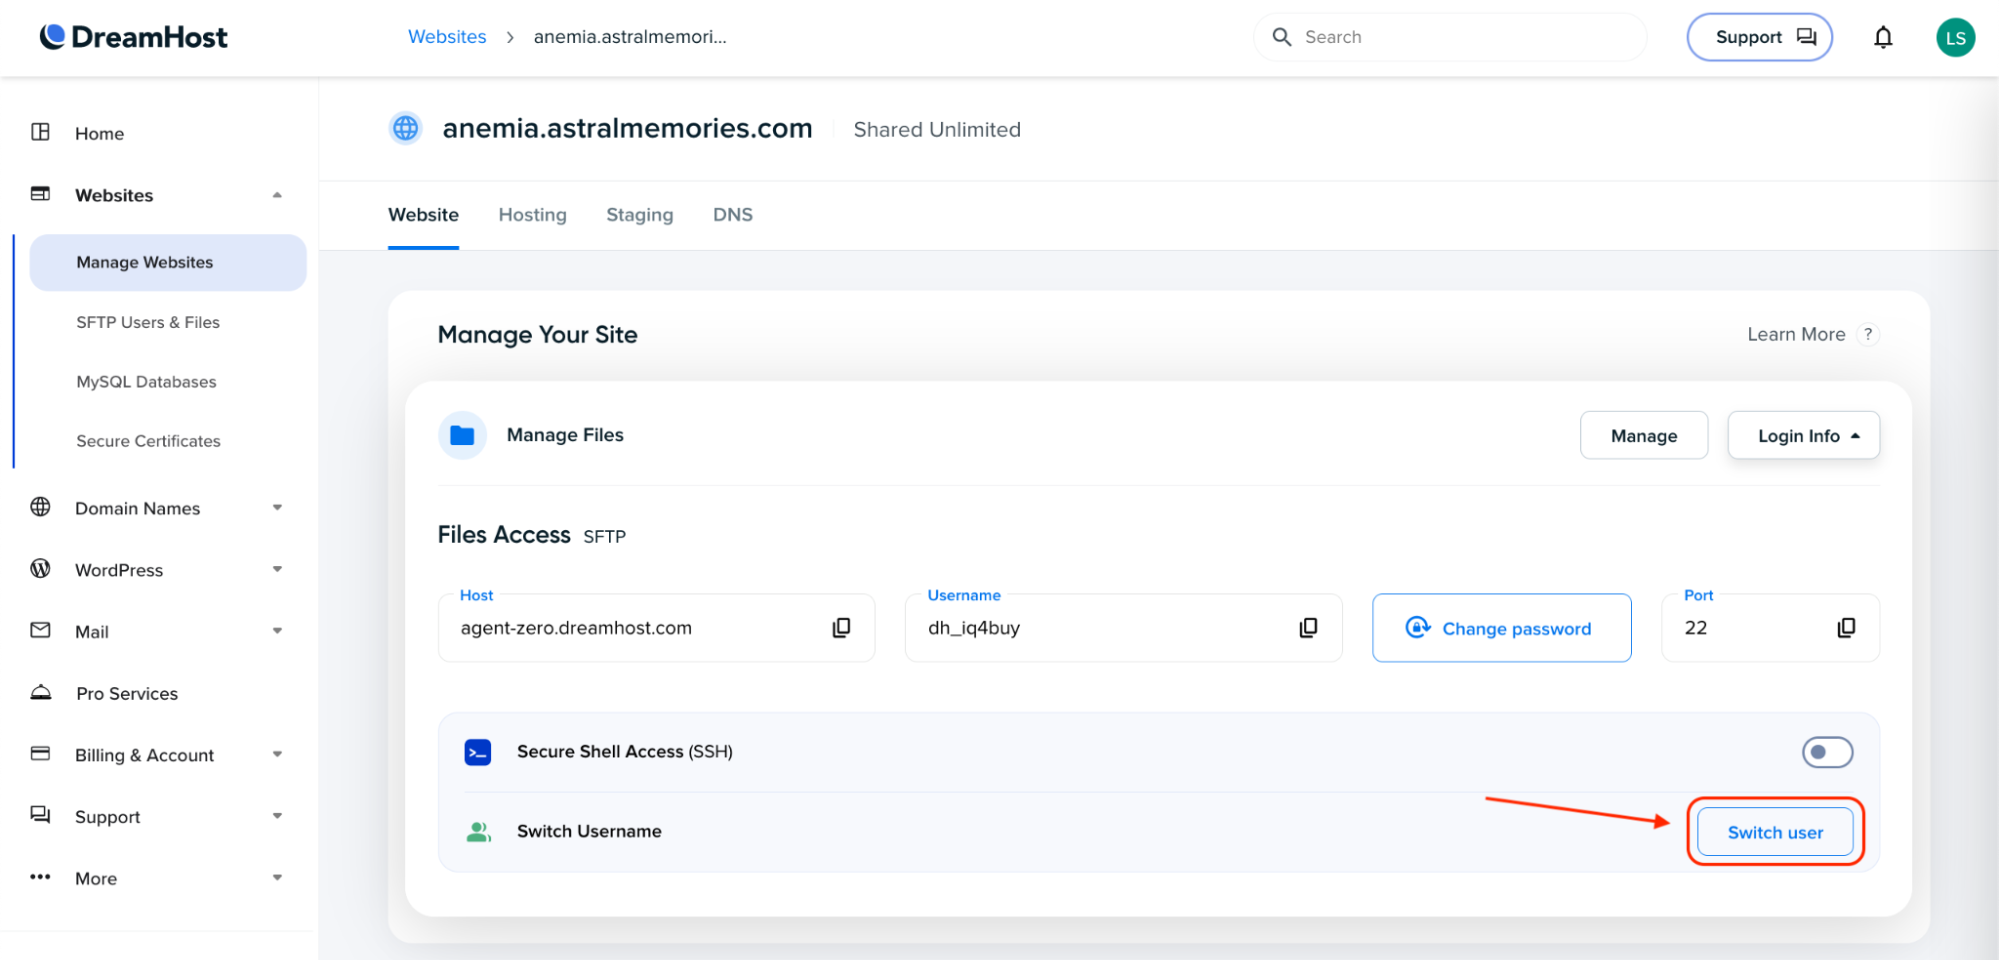
Changing your domain’s username (Optional)
https://help.dreamhost.com/hc/en-us/articles/214895317-Change-the-PHP-version-of-a-site
- Navigate to the Manage Websites page.
- Click the Manage button to open the Manage Websites page, which allows you to adjust various settings for your site.
- If in Grid view, click the Manage button at the bottom of the website box.
- If in List view, click the Manage button at the far right of your domain name.
- Click the Login Info button under Manage Your Site.
- Click the Switch user button.
Select the user you want to control this domain from the dropdown and click the “Save user” button:
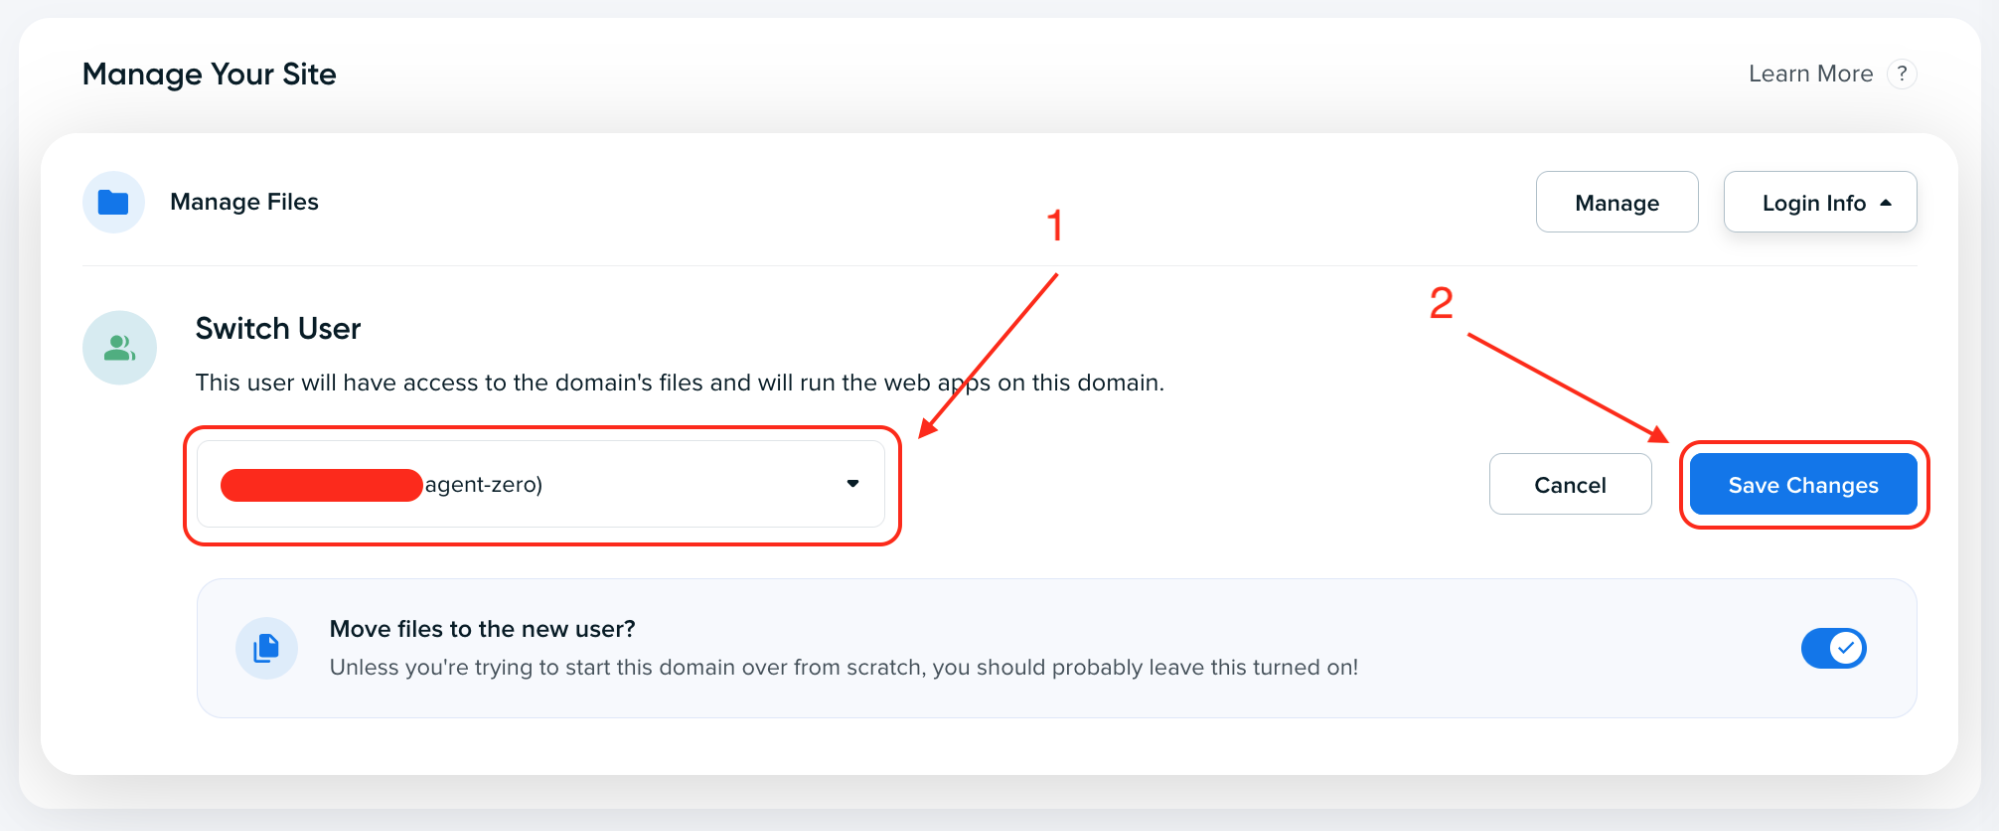
Wait until the process is complete:

Change the PHP version the shell uses
https://help.dreamhost.com/hc/en-us/articles/214202148-Change-the-PHP-version-the-shell-uses
Make sure you’re in your user’s directory by running the following:
cd ~Edit the .bash_profile file:
nano .bash_profileAdd the following line to force PHP 8.1:
export PATH=/usr/local/php81/bin:$PATHSave and close the file and return to your shell.
Update that file by running the following command:
. ~/.bash_profileIf you now run php -v you’ll see the new version being used:
php -vPHP 8.1.17 (cli) (built: Apr 12 2023 20:44:31) (NTS)
Copyright (c) The PHP Group
Zend Engine v4.1.17, Copyright (c) Zend Technologies
with Zend OPcache v8.1.17, Copyright (c), by Zend TechnologiesInstall Composer Globally
https://help.dreamhost.com/hc/en-us/articles/214899037-Installing-Composer-overview
Login to your server via SSH and Navigate to your user’s home directory:
cd ~Make a directory for installation. You can choose any valid directory name, but these instructions will assume the directory ~/.php/composer:
mkdir -p ~/.php/composerNavigate to the installation directory:
cd ~/.php/composerRun the Composer installer:
curl -sS https://getcomposer.org/installer | phpEdit your existing .bash_profile located in your user’s home directory:
cd ~
nano .bash_profile
Add the following path to the composer.phar file. Replace username with your shell username:
export PATH=/home/username/.php/composer:$PATHSave the file and close it.
Run the following to update your .bash_profile:
. ~/.bash_profileRename the composer file for easier handling:
mv ~/.php/composer/composer.phar ~/.php/composer/composerTest composer:
composer ______
/ ____/___ ____ ___ ____ ____ ________ _____
/ / / __ \/ __ `__ \/ __ \/ __ \/ ___/ _ \/ ___/
/ /___/ /_/ / / / / / / /_/ / /_/ (__ ) __/ /
\____/\____/_/ /_/ /_/ .___/\____/____/\___/_/
/_/
Composer version 2.5.8 2023-06-09 17:13:21Create a Drupal project with Composer
The drupal/recommended-project creates a new Drupal site with a “relocated document root”. This means that the files “index.php” and the “core” directory and so on are placed inside a subfolder named “web” rather than being placed next to “composer.json” and the “vendor” directory at the project root. This layout is recommended because it allows you to configure your webserver to only provide access to files inside the “web” directory. Keeping the vendor directory outside of the web server’s document root is better for security.
Remove the existing folder of your website, in my case, is anemia.astralmemories.com:
rm -rf anemia.astralmemories.com/Use Composer to create a new project using the desired starter template, for this tutorial, I will use Drupal’s recommended project version 10.1.1:
composer create-project drupal/recommended-project:10.1.1 anemia.astralmemories.comYou should see the following success message:
  Congratulations, you've installed the Drupal codebase
  from the drupal/recommended-project template!

Next steps:
  * Install the site: https://www.drupal.org/docs/installing-drupal
  * Read the user guide: https://www.drupal.org/docs/user_guide/en/index.html
  * Get support: https://www.drupal.org/support
  * Get involved with the Drupal community:
  	https://www.drupal.org/getting-involved
  * Remove the plugin that prints this message:
  	composer remove drupal/core-project-message
  * Homepage: https://www.drupal.org/project/drupal
  * Support:
	* docs: https://www.drupal.org/docs/user_guide/en/index.html
	* chat: https://www.drupal.org/node/314178
Remove the core-project-message plugin:
cd anemia.astralmemories.com/
composer remove drupal/core-project-message
Create the configuration file and grant permissions
In the “web/sites/default” directory, copy the default.settings.php file and rename the copied file to settings.php:
cp web/sites/default/default.settings.php web/sites/default/settings.phpGive the web server write privileges (666 or u=rw,g=rw,o=rw) to the configuration file:
chmod a+w web/sites/default/settings.phpGive the web server write privileges to the web/sites/default directory:
chmod a+w web/sites/defaultCreate the Drupal database
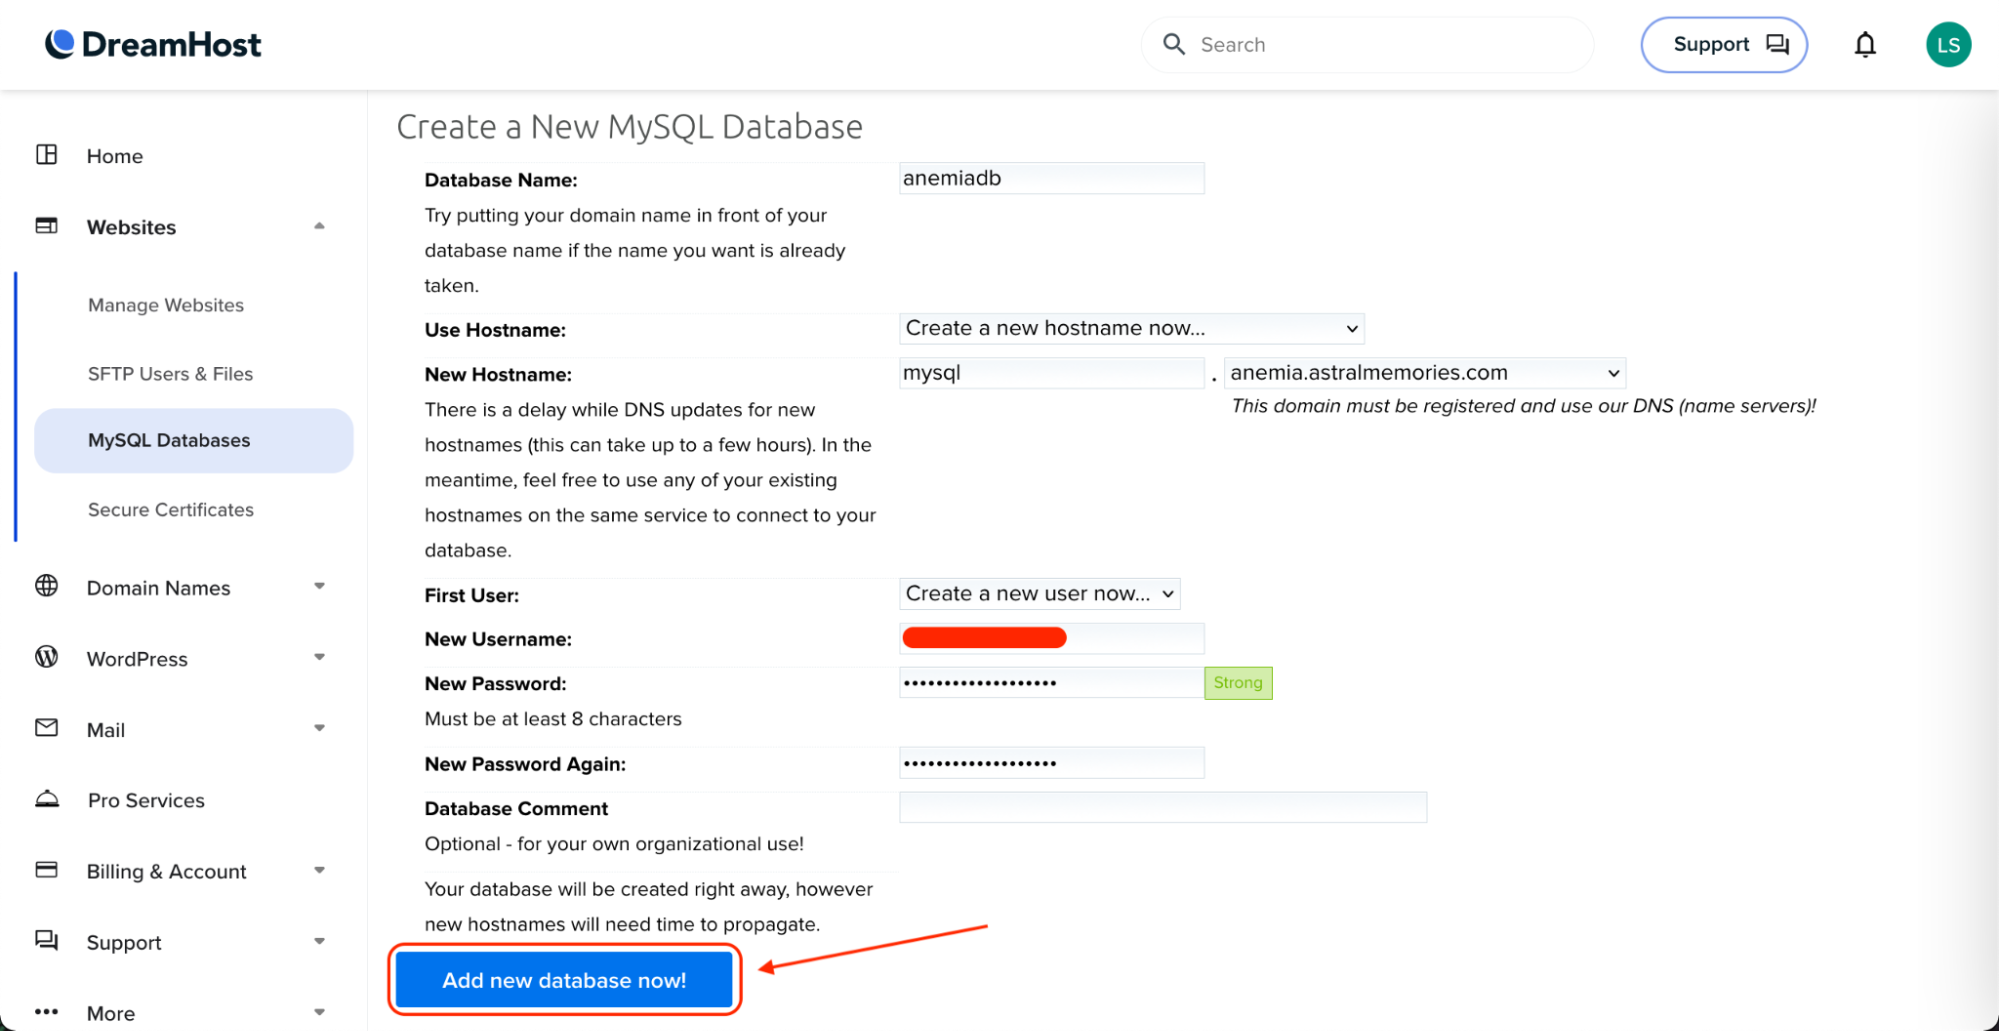
In order to successfully complete the installation process, it is necessary to create an empty database for your new website.
Sign in to your DreamHost account and navigate to “Websites -> MySQL databases”. Under the “Create a New MySQL Database” section, fill out the following fields:
- Database name: anemiadb
- Use Hostname: Create a new hostname now…
- New Hostname: mysql.anemia.astralmemories.com
- First User: Create a new user now…
- New Username: YOUR_USERNAME
- New Password: CREATE A SECURE PASSWORD
- New Password Again: SAME SECURE PASSWORD
Click the “Add new database now!” button:
Domain directory configuration
To set the domain directory, navigate to the “Website -> Manage Website” section and click on the “Manage” button located next to your new website domain (anemia.astralmemories.com):

Navigate to the “Additional Settings” section and click on the “Paths” tab to access further options. In the Web directory text field, enter the path to the “web” directory of your newly created Drupal application (anemia.astralmemories.com/web):

Run the Drupal installation wizard
You are now ready to run the Drupal installation wizard. Navigate to the base URL of your website (https://anemia.astralmemories.com) and follow the installation instructions.
Choose language: English

Select an installation profile: Standard (Install with commonly used features pre-configured):
- Database configuration:
- Database type: MySQL, MariaDB, Percona Server, or equivalent.
- Database name: anemiadb
- Database username: YOUR DATABASE USERNAME
- Database password: YOUR DATABASE PASSWORD
- Database configuration – Advanced Options:
- Host: mysql.anemia.astralmemories.com
- Port number: 3306

Click the “Save and Continue” button.
Once the Drupal site gets installed, the final step is to enter the site information and define the site maintenance account (User 1):
- Site Information:
- Site Name: Anemia
- Site email Address: youremail@yourdomain.you
- Site Maintenance Account:
- Username: your_username
- Password: Enter a strong password
- Confirm password
- Email address: youremail@yourdomain.you
- Regional Settings:
- Default country: United States
- Default time zone: Denver

Click the “Save and Continue” button.
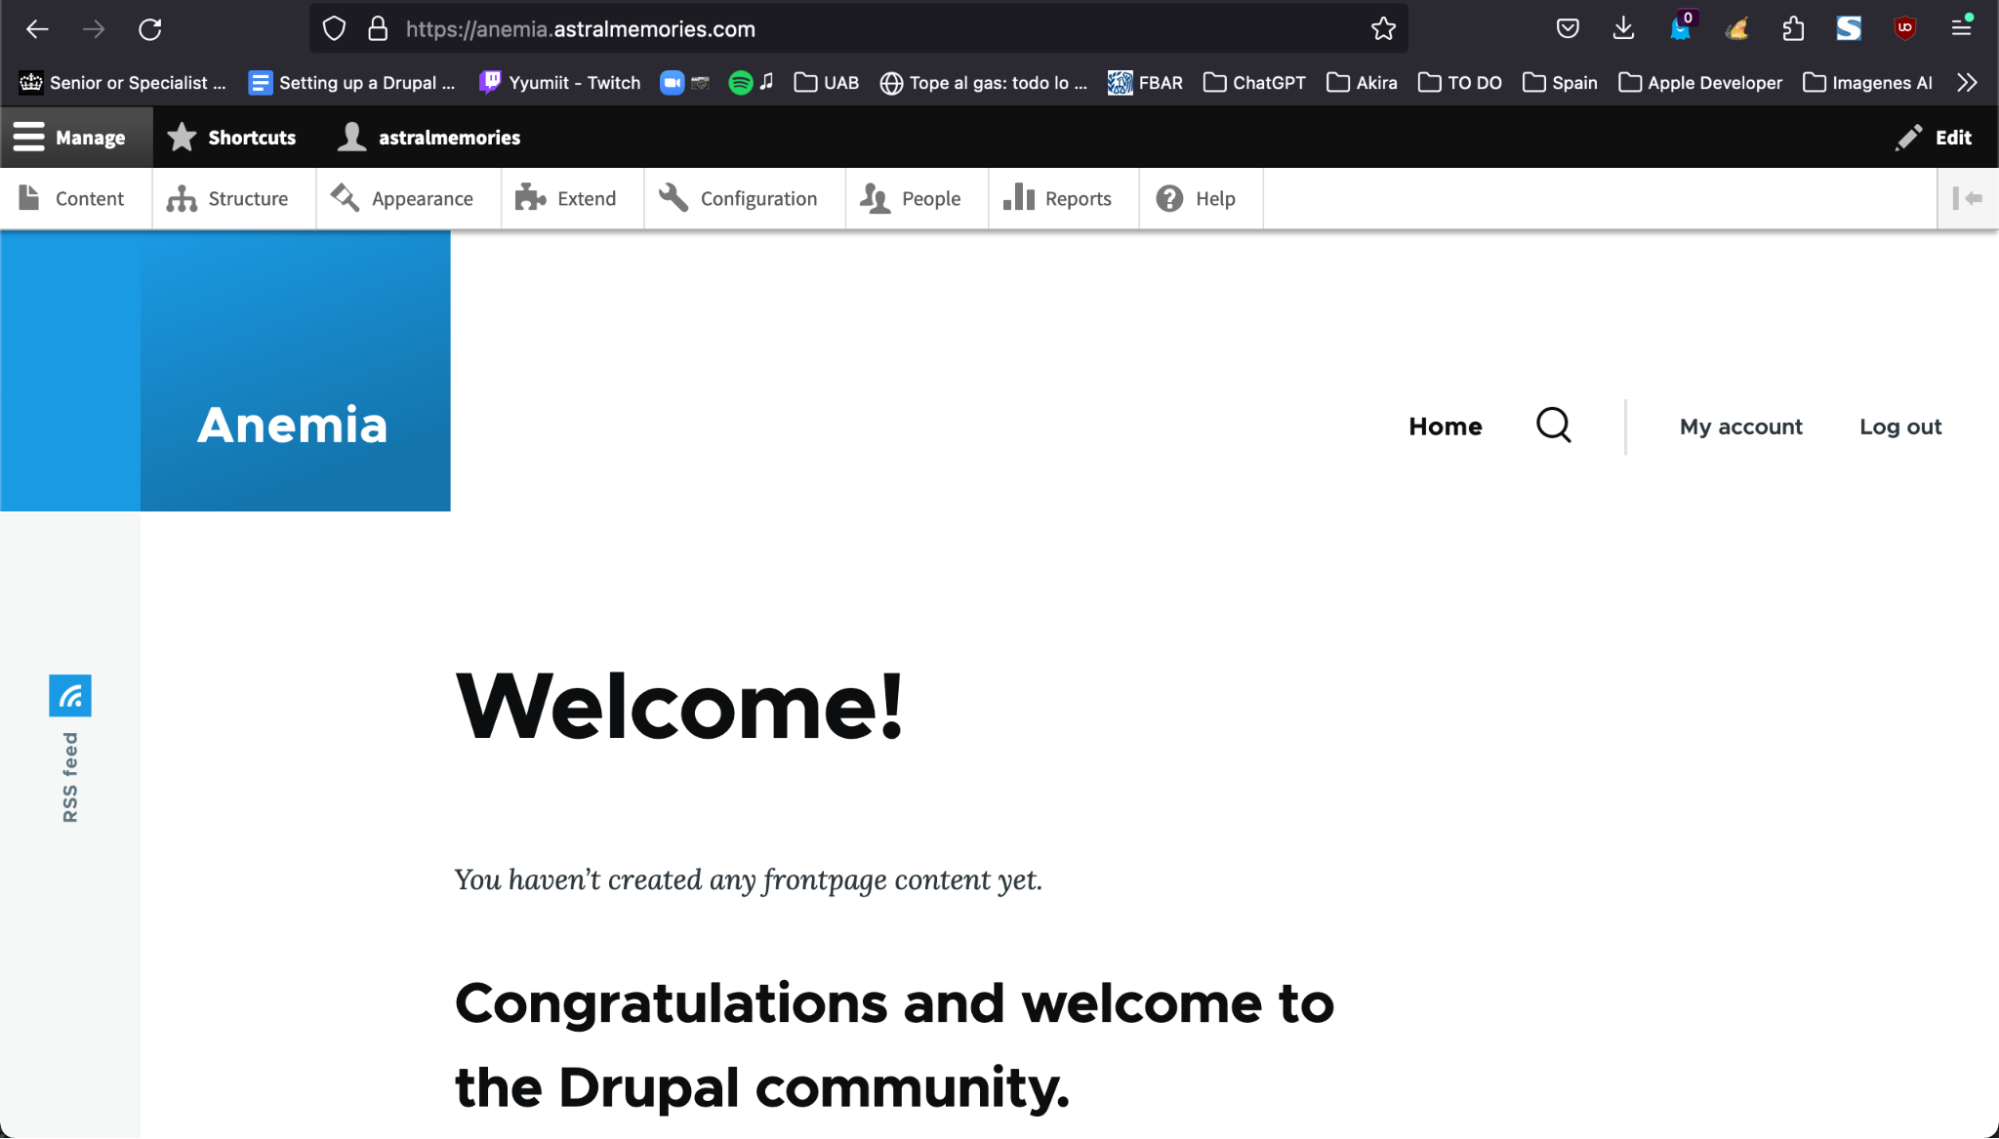
Now you should see your new Drupal website:
Install Drush 12 with Composer
https://help.dreamhost.com/hc/en-us/articles/217258337-Drush
Login to your server via SSH and navigate to your website directory. Execute the following composer command to install Drush:
cd anemia.astralmemories.com/
composer require drush/drush
Edit your .bash_profile file with “nano” or “vim”:
cd
nano .bash_profile
Add the following line to your .bash_profile (Replace “anemia.astralmemories.com” with your website directory):
alias drush='~/anemia.astralmemories.com/vendor/drush/drush/drush'Save the changes made to your .bash_profile and exit the file. Then, use the following command to update your .bash_profile:
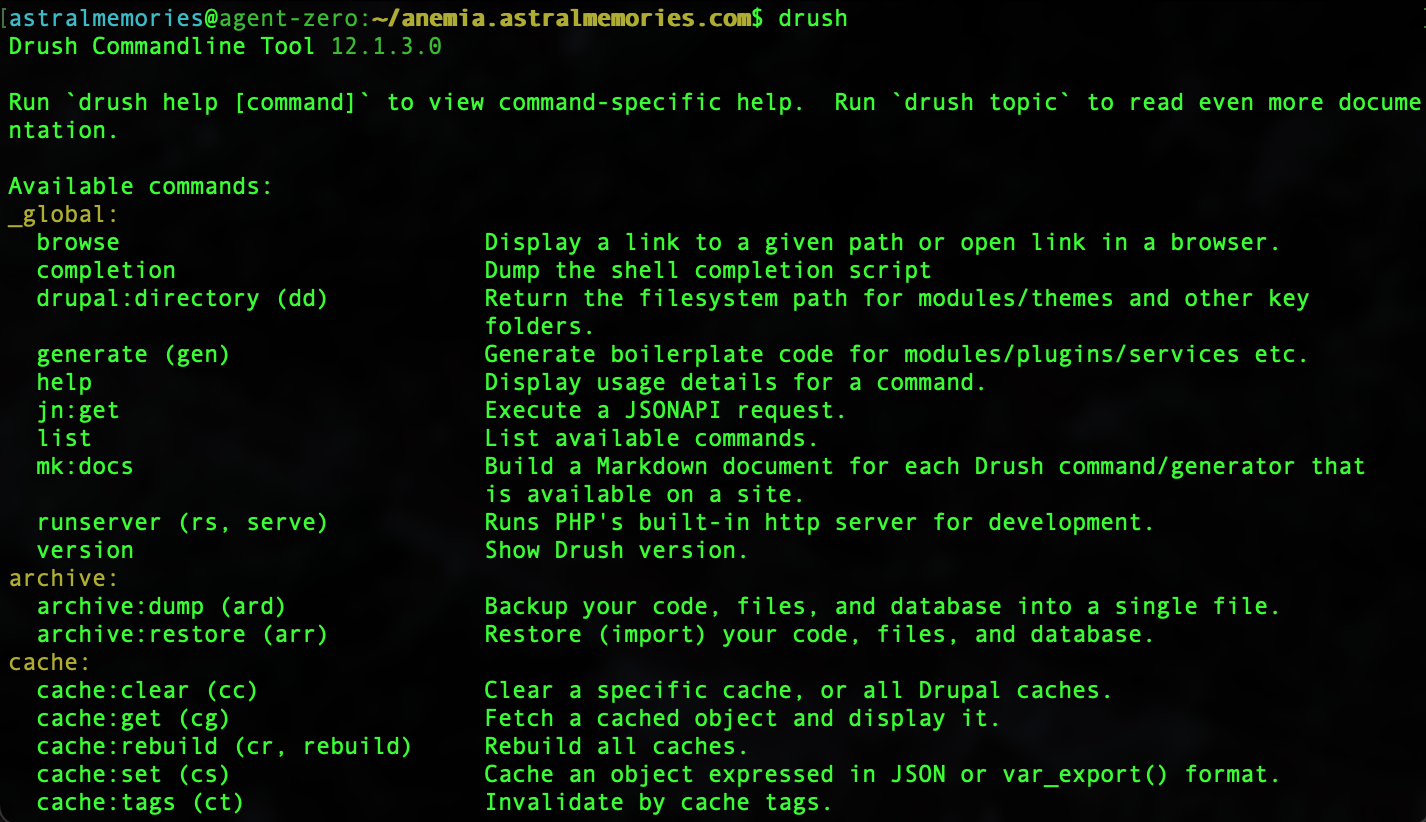
. ~/.bash_profileNow you should be able to use Drush:
Navigate to your new Drupal application root directory (anemia.astralmemories.com/) and execute “drush status”:
cd anemia.astralmemories.com/
drush status
astralmemories@agent-zero:~/anemia.astralmemories.com$ drush status
Drupal version : 10.1.1
Site URI : http://default
DB driver : mysql
DB hostname : mysql.anemia.astralmemories.com
DB port : 3306
DB username : astralmemories
DB name : anemiadb
Database : Connected
Drupal bootstrap : Successful
Default theme : olivero
Admin theme : claro
PHP binary : /usr/local/php81/bin/php
PHP config : /etc/php81/php.ini
PHP OS : Linux
PHP version : 8.1.17
Drush script : /home/astralmemories/anemia.astralmemories.com/v
endor/drush/drush/drush
Drush version : 12.1.3.0
Drush temp : /tmp
Drush configs : /home/astralmemories/anemia.astralmemories.com/v
endor/drush/drush/drush.yml
Install profile : standard
Drupal root : /home/astralmemories/anemia.astralmemories.com/w
eb
Site path : sites/default
Files, Public : sites/default/files
Files, Temp : /tmp
astralmemories@agent-zero:~/anemia.astralmemories.com$Congratulations on successfully installing a fresh instance of Drupal 10 using a composer-based codebase with the added functionality to execute drush commands on your Drupal site.